The purpose of this document is to describe the kinds of tests carried out on the CReME™ Invoice Module.
1.2) Create InvoiceThis section explains how to generate each type of invoice, Credit Notes, Debit Notes and edit invoice information like date and remarks. The Create Invoice page supports the creation of several types of invoices. To go to this page navigate to Menu > PO, DN & Invoice > Create Invoice.
Each type of invoice is described in the table below. After completing the data preparation steps, you will see that type of invoice will have some pending items. Then you can proceed with invoice creation.
| Invoice Type | Description | Data Preparation | Invoice Creation |
|---|---|---|---|
| Handling & Storage (E) | This section generates invoices for export shipments where handling and storage charges are billed to the same customer. | 1) Using CReME Office, create an Export Shipment with ATA about 2 weeks from now 2) Using CReME roro, perform Gate In and Loading for a few units |
Create Invoice for Handling & Storage (E) |
| Handling & Storage (I) | This section generates invoices for import shipments where handling and storage charges are billed to the same customer. | The Data Preparation for Handling & Storage (I), Handling Only (I) and Storage Only (I) can be shared. 1) Using CReME Office, create an Import Shipment with ATA about 2 weeks ago 2) When uploading the manifest, choose 2 Shipping Agents : one that wants handling and storage charges to be combined in the same invoice (NYK, KLine etc) and one that wants them separated (Giga). 3) Using CReME roro, perform Discharge and Gate In on a few units. Remember to do this for units from both Shipping Agents. 4) Using CReME office, create a Pulling Order containing all these units. If you require guidance on how to do this, you may refer to How to Create a Pulling Order. 5) Using CReME office, create a few Delivery Notes containing these units. If you require guidance on how to do this, you may refer to How to Create a Delivery Note. |
Create Invoice for Handling & Storage (I) |
| Handling Only (I) | This section processes only handling charges for customers where handling and storage charges are billed separately. | Create Invoice for Handling Only (I) | |
| Storage Only (I) | This section processes only storage charges for customers where handling and storage charges are billed separately. | Create Invoice for Storage Only (I) | |
| Mixed Charge Codes | This section generates invoices for import and export shipments where a mix of charge codes are billed to the same customer. | 1) Using CReME Office, create an Export/Import Shipment 2) Using CReME roro, perform Gate In and Loading for a few units 3) If it is an Export shipment, let the ATA be about 2 weeks from now. Using CReME roro, perform Gate In and Loading for a few units 4) If it is an Import shipment, let the ATA be about 2 weeks ago. Using CReME roro, perform Discharge and Gate In for a few units followed by Pulling Order and Delivery Note. |
Create Invoice for Mixed Charge Codes |
| PDI | This section generates invoices for PDI services. | 1) Using CReME Office, upload a manifest containing units from a few Makes. |
Create Invoice for PDI |
| RORO | This section generates invoices for RORO charges. | 1) For Import Shipments, Discharge must be carried out on all units. 2) For Export Shipments, Loading must be carried out on all units. |
Create Invoice for RORO charges |
| Stevedorage | This section generates invoices for stevedorage charges. | Create Invoice for Stevedorage charges | |
| Tally | This section generates invoices for tally charges. | Create Invoice for Tally charges |
The previous section explains how to create invoices. This section explains how to manage invoices after they have been created.
| Activity Name | Description | Activity Implementation |
|---|---|---|
| Append to Credit Note | Adds a line item to a Credit Note that already exists | Append to Credit Note |
| Append to Debit Note | Adds a line item to a Debit Note that already exists | Append to Debit Note |
| Create Credit Note | Creates a new Credit Note | Create Credit Note |
| Create Debit Note | Creates a new Debit Note | Create Debit Note |
| Print Preview | Allows the user to preview the Invoice, Credit Notes and Debit Notes before printing, if required. | Print Preview |
| Remove from Credit Note | removes a line item from the Credit Note | Remove from Credit Note |
| Remove from Debit Note | Removes a line item from the Debit Note | Remove from Debit Note |
| Update Invoice | Updates the remarks and Invoice Date | Update Invoice |
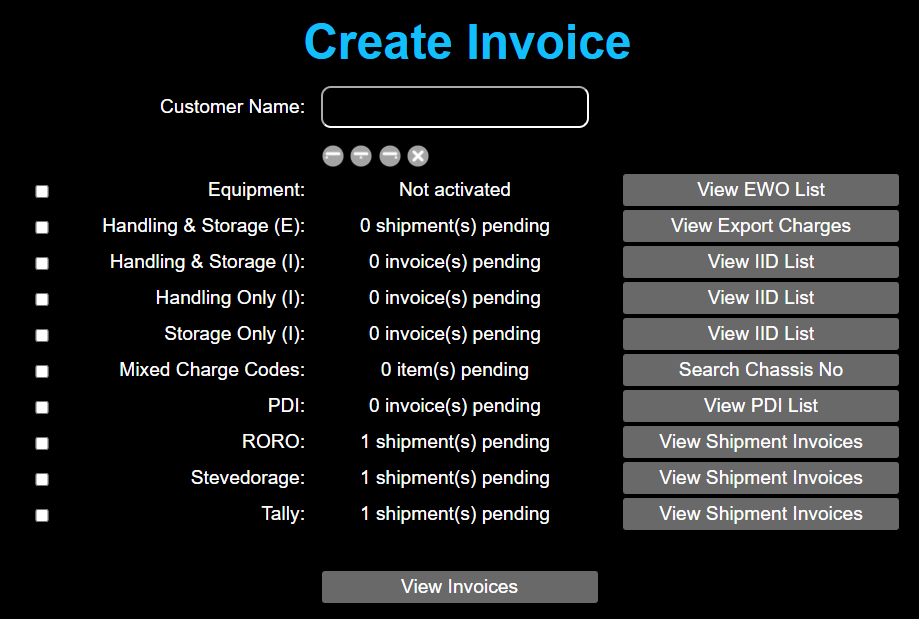
After completing the data preparation, the Create Invoice page shows there is 1 shipment pending under Handling & Storage (E).
Use the SearchBox to select a customer. Click on that customer to select it.
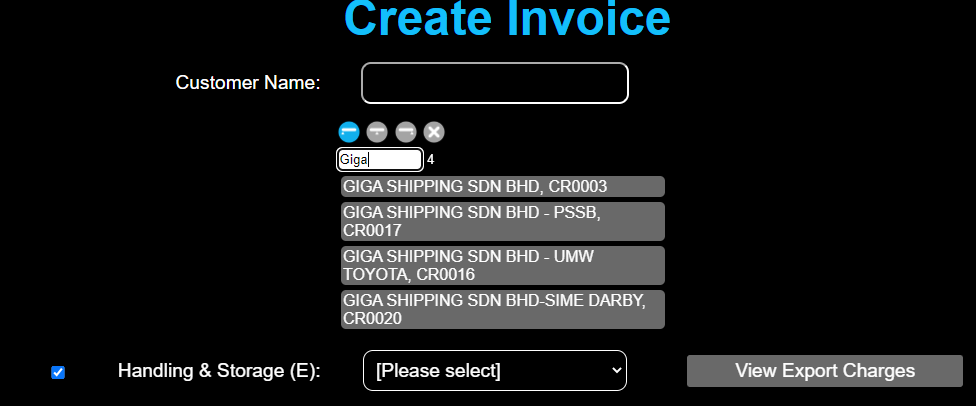
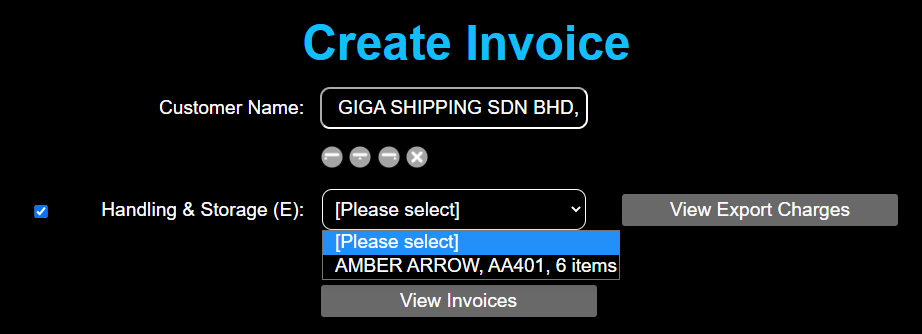
The screenshot below shows the customer has been selected. Next, click on [Please select] to select a shipment.
Selecting a shipment displays the items in that shipment. The "Pending" list contains those items that have passed Gate In and Loading. If an item has not been loaded, it will not appear in "Pending".
The items under the Invoice number (22060082) have been added to the invoice.
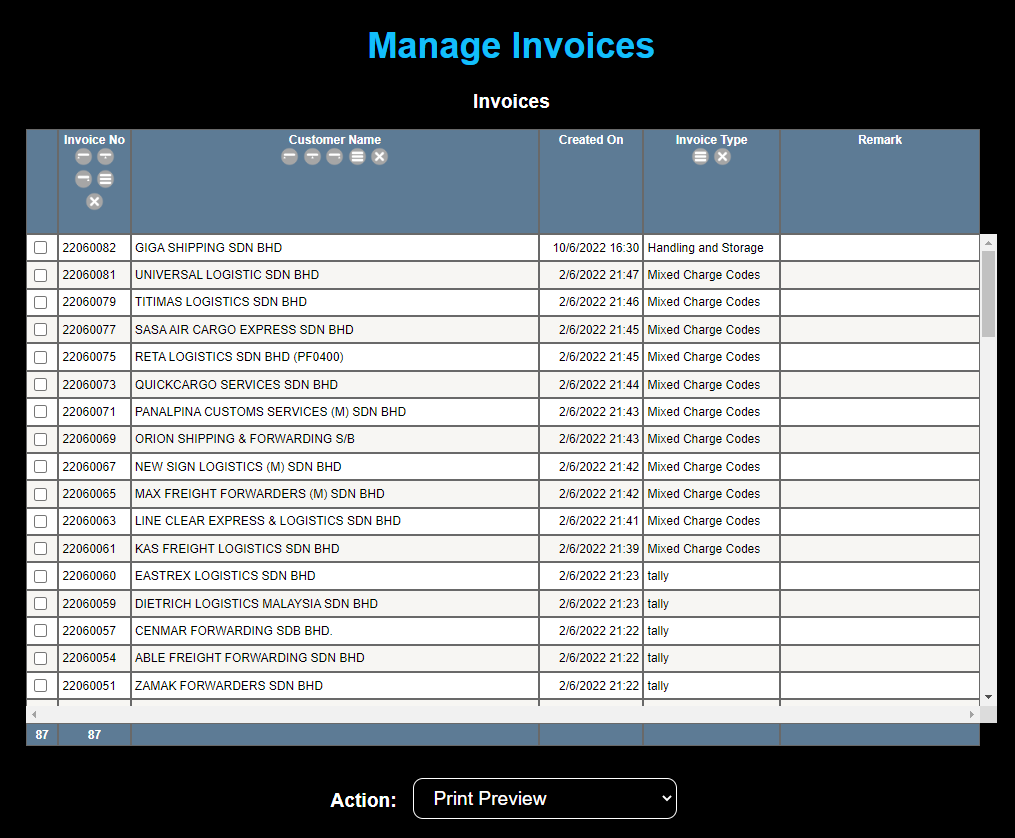
Clicking the "View Invoices" button brings the user to the "Manage Invoices" page. You can learn more at Manage Invoices
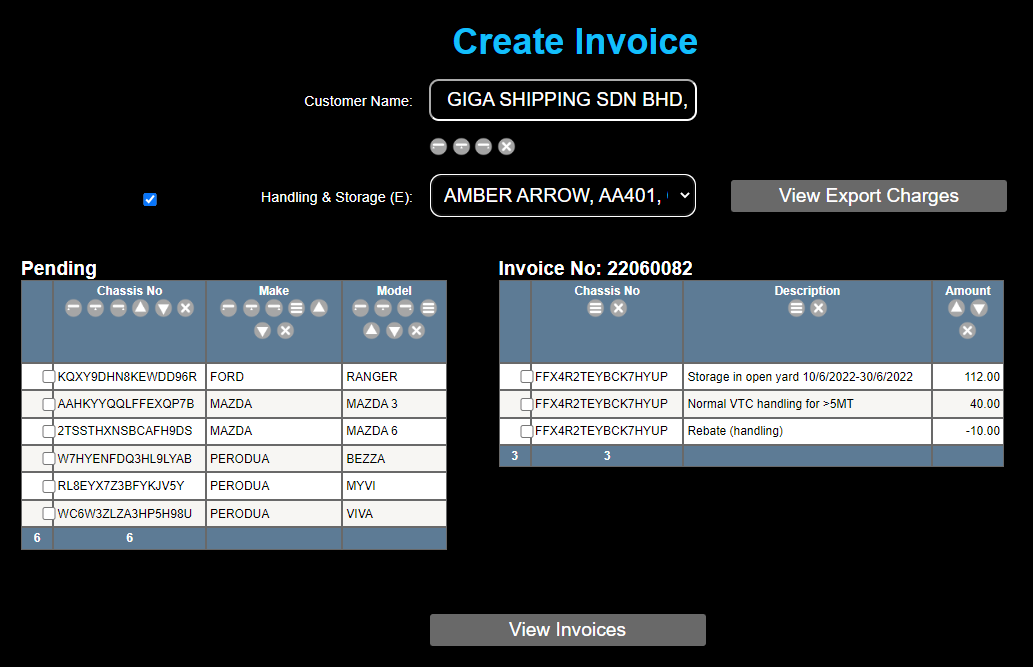
To add an item to the invoice, tick the check box for that item under "Pending".
To remove an item from the invoice, tick the check box under "Invoice No:"
To view the invoice, click on "View Invoices". This brings you to the "Manage Invoices" page. Ensure the "Action" option is "Print Preview". Tick the check box next to the invoice number (22060082).
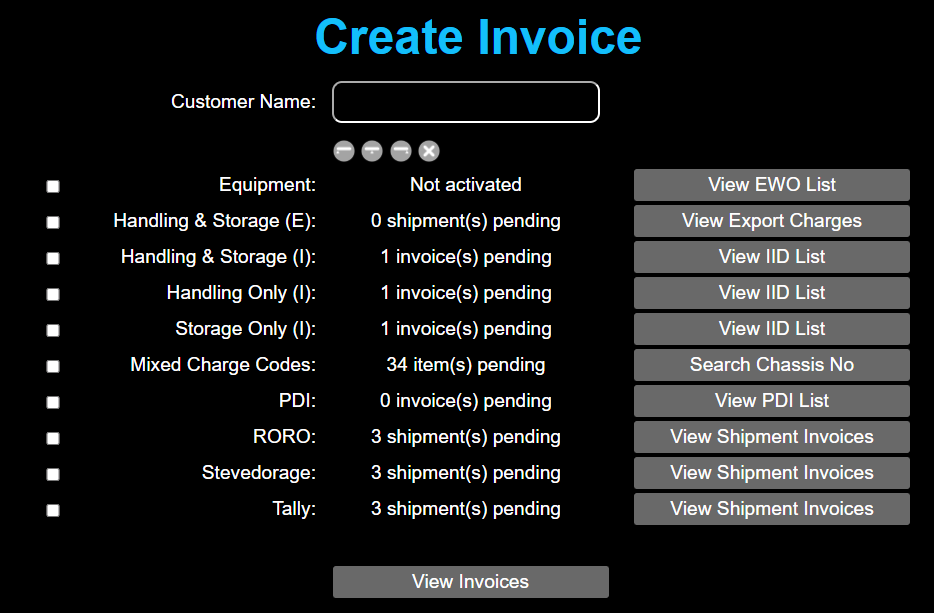
2.2) Create Invoice for Handling & Storage (I)After completing the data preparation, the Create Invoice page shows there is 1 shipment pending under Handling & Storage (1).
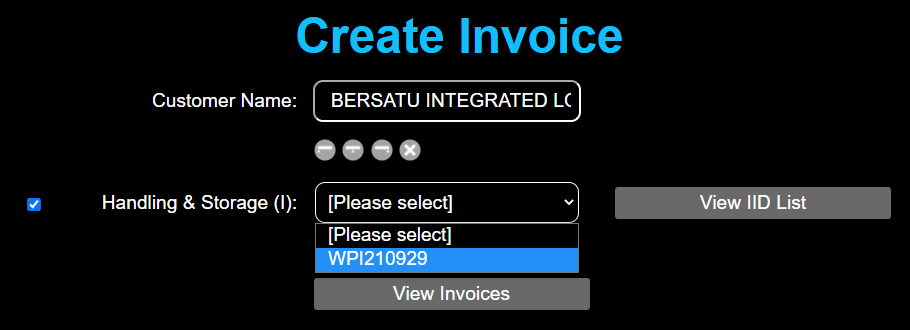
Use the SearchBox to select a customer. Click on that customer to select it. The screenshot below shows the customer has been selected. Next, click on [Please select] to select a shipment. Click "Create Invoice".
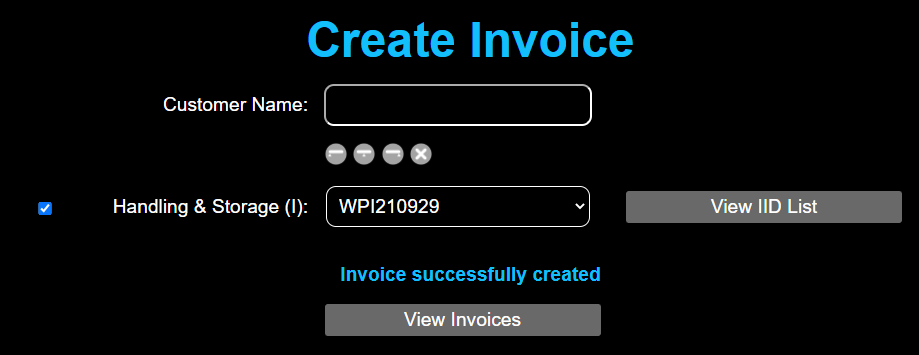
The screenshot below shows the invoice was successfully created.
Clicking the "View Invoices" button brings the user to the "Manage Invoices" page. You can learn more at Manage Invoices
The steps for creating an invoice are the same as for Handling & Storage (I). Please refer to Create Invoice for Handling & Storage (I)
2.4) Create Invoice for Storage Only (I)The steps for creating an invoice are the same as for Handling & Storage (I). Please refer to Create Invoice for Handling & Storage (I)
2.5) Create Invoice for Mixed Charge CodesThis method is used when a few Charge codes are combined into a single invoice.
As an example, we will use Chassis Number U7AYQTZ76BF5VERJ7. Find this Chassis Number using "Search Chassis Number". (Menu > Search Chassis Number).

Select the shipment by ticking the check box next to the Vessel Title. This displays two charge items (handling and storage)
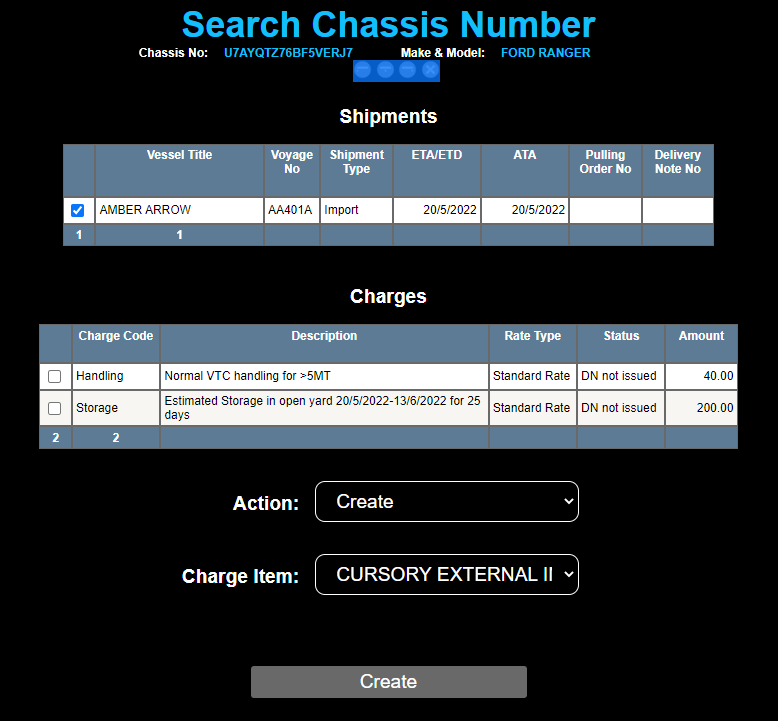
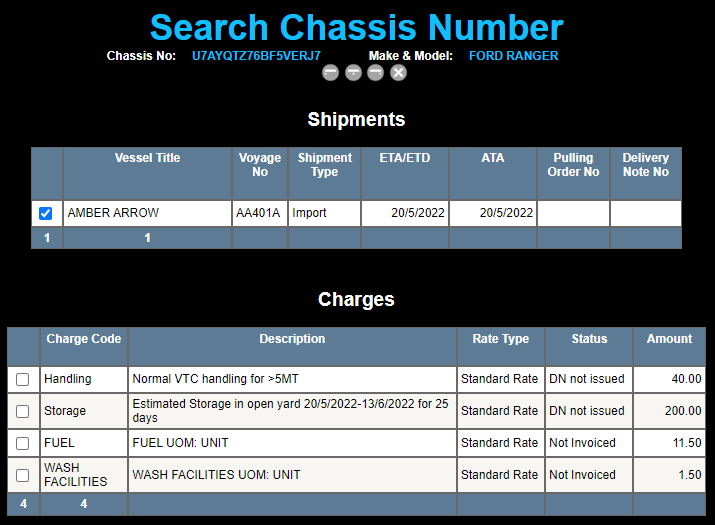
To add a Charge Item, select Action: Create. Select a Charge Item. Click "Create". In the screenshot below, 2 charge items were added: Fuel and Wash Facilities.
To remove a Charge Item, select the item to remove. Select Action: Delete. Click "Delete".
To update the amount of a Charge Item, select the item to update. Select Action: Update Amount. Type the amount to be updated in the "Amount" box. Click on the "Update Amount" button.
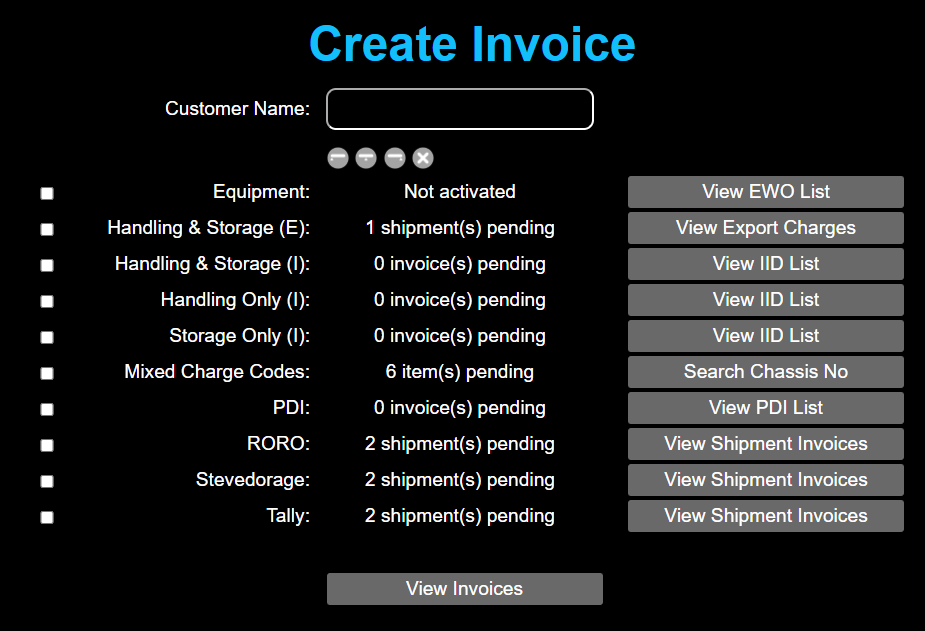
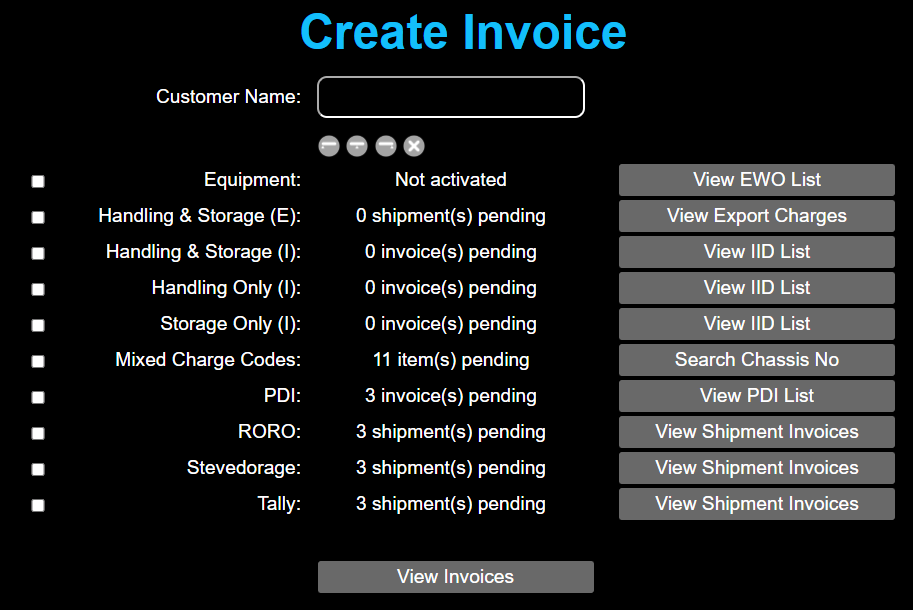
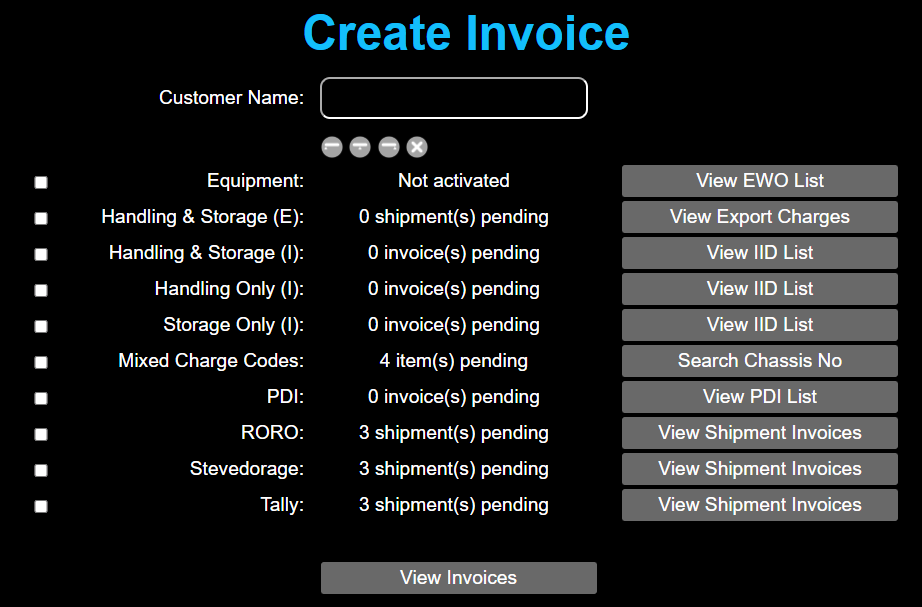
After completing the data preparation, the Create Invoice page shows there are 8 items pending under Mixed Charge Codes.
Selecting a shipment displays the items in that shipment. The "Pending" list contains those items that have passed Gate In and Loading (Export Shipments) or Discharge, Gate In and Delivery Note issued (Import Shipments).
The 4 items we saw in "Search Chassis Number" appear here under Chassis Number "U7AYQTZ76BF5VERJ7". Putting a tick boox next to each these 4 items will cause 4 items to be added to the right hand list (invoiced items).

The items under the Invoice number (22060088) have been added to the invoice.
Clicking the "View Invoices" button brings the user to the "Manage Invoices" page. You can learn more at Manage Invoices
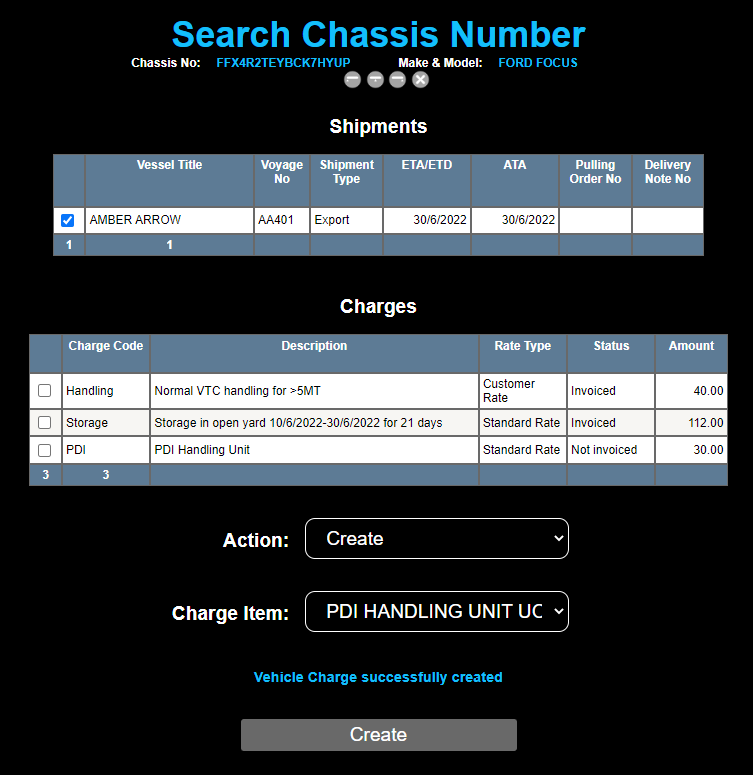
2.6) Create Invoice for PDIThe user begins by adding a PDI Charge Item for each unit that has undergone PDI services. Find each Chassis Number using "Search Chassis Number". (Menu > Search Chassis Number), then add a PDI Charge Item to each Chassis Number.
After creating 7 PDI Charge Items, the "Create Invoice" page shows 3 invoices pending.
How does 7 items become 3 invoices? Because the 7 items consist of 3 makes. For PDI invoicing, the PDI CHarge Items are groupd by Make. Ticking the check box and clicking on [Please select] shows the breakdown of the 7 items.
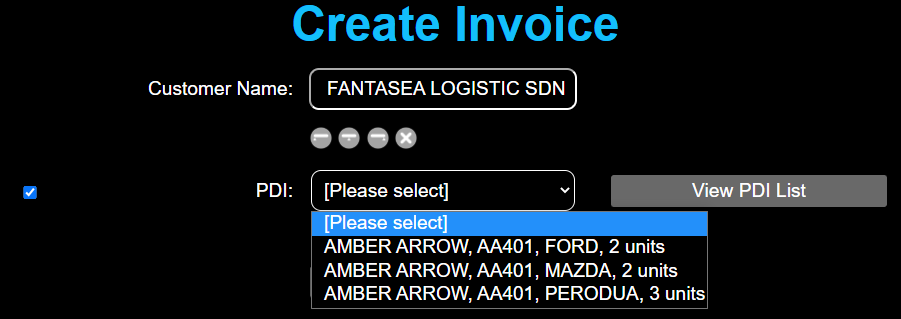
Use the SearchBox to select a customer. Click on that customer to select it. Next, click on [Please select] to select a Make. Click "Create Invoice".
2.7) Create Invoice for ROROThe "Create Invoice" page shows 3 shipments pending.
Use the SearchBox to select a customer. Click on that customer to select it. Next, click on [Please select] to select a Shipment. Click "Create Invoice".
2.8) Create Invoice for StevedorageCreating an invoice for Stevedorage charges follows the same process as Create Invoice for RORO Charges
2.9) Create Invoice for TallyCreating an invoice for Tally charges follows the same process as Create Invoice for RORO Charges
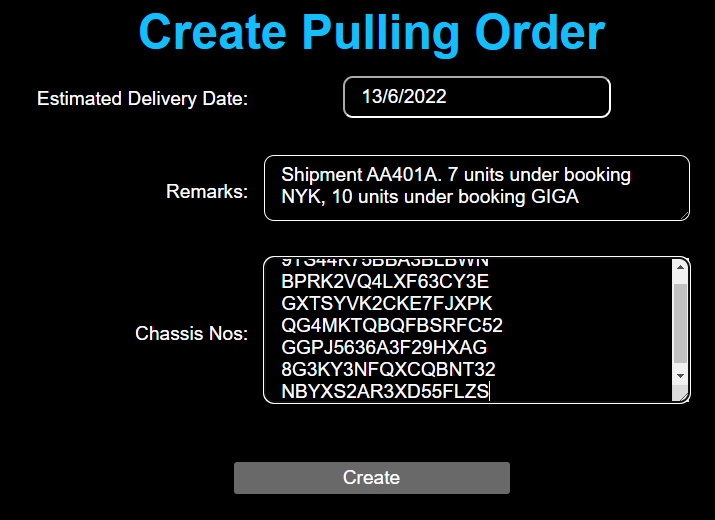
Got to the "Create Pulling Order Page" (Menu > PO, DN & Invoice > Create Pulling Order)
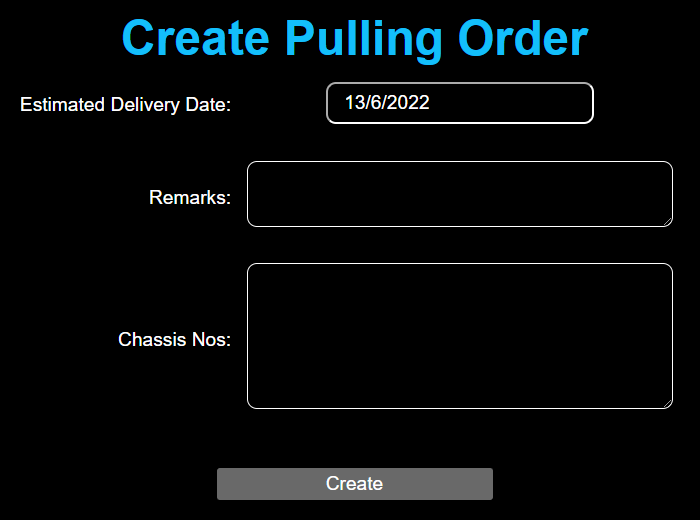
Change the Estimated Delivery Date if necessary. Fill in the remarks and Chassis Numbers. The Chassis Nos box accepts a few hundred Chassis Numbers in a single copy and paste. Click the "Create" button to create the Pulling Order.
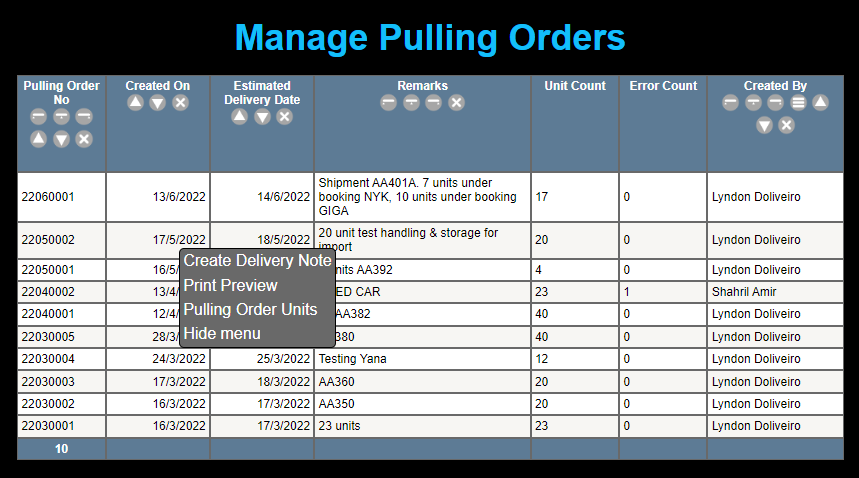
Checking the "Manage Pulling Orders" page shows the Pulling Order has been created. This page can be reached at Menu > PO, DN & Invoice > Manage Pulling Orders. Clicking on a Pulling Order displays a pop-up menu.
If you have not yet created a Pulling Order, you may do so according to How to Create a Pulling Order.
If you have already created the Pulling Order, navigate to the Manage Pulling Orders page. If you require guidance on how to do this, you may refer to the Manage Pulling Orders page. Within the "Manage Pulling Orders" page, click on the Pulling Order which contains the units for the Delivery Note. From the pop-up menu, select "Create Delivery Note".
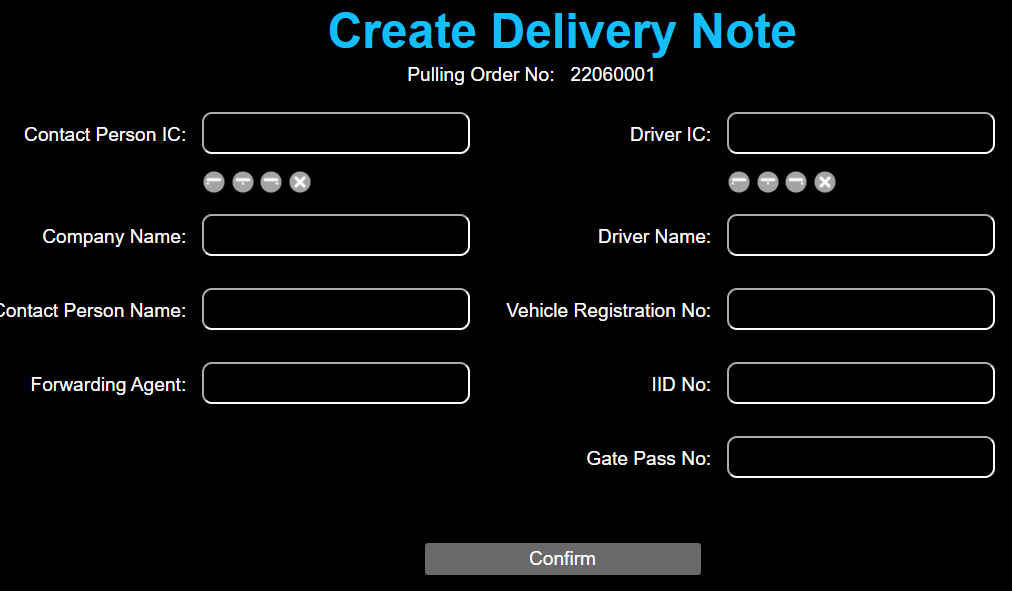
Beginning with Contact Person, use the SearchBox to find the IC number if the Contact Person is already in CReME™
If the Contact Person is not already in CReME™, you may input this manually.
Use the SearchBox to find the IC number of the Driver is the Driver is already in CReME™.
If the Driver is not already in CReME™, you may input this manually.
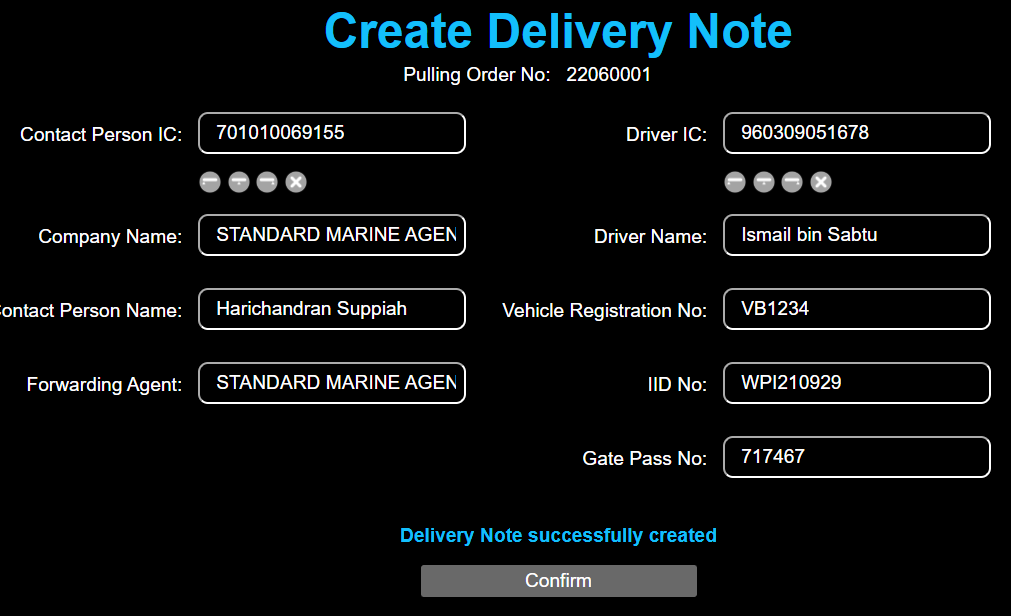
After clicking "Confirm", the status shows the Delivery Note is successfully created.
Navigating to the Manage Delivery Notes page (Menu > PO, Dn & Invoice) shows the Delivery Note at the top of the list.
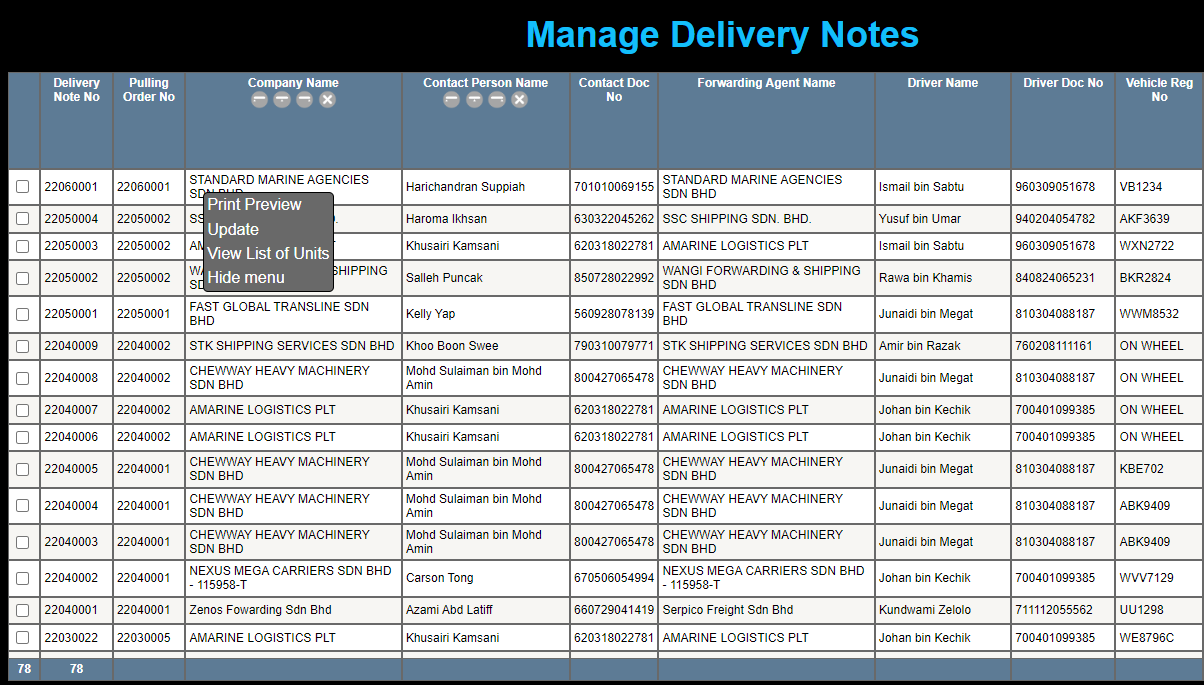
Clicking on "View List of Units" brings the user to the "View Delivery Note Units" page.

The SearchBox is used to add units to the Delivery Note.
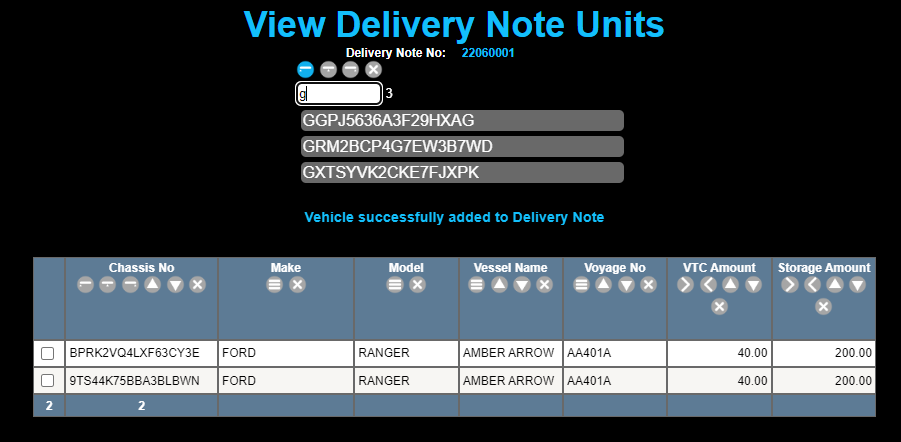
Clicking on the check box next to the Chassis Number selects the unit. Clicking on the "Delete" button will remove the unit from the Delivery Note.
